
1. Before you begin
In this codelab, you'll learn to use Firebase Genkit, which is an open-source framework for integrating generative AI into your app. You can use Genkit with many app development skills and tools with which you're already familiar, like Firestore.
Prerequisites
- Familiarity with Firestore, Node.js, and TypeScript.
What you'll learn
- Explore new ways to build with Firestore using vector similarity search.
- Demystify generative AI and make it practical for "everyday" app development using Genkit.
- Prepare your solution for integration and deployment.
What you'll need
- A browser of your choice, such as Google Chrome
- A development environment with a code editor and terminal
- A Google Account for the creation and management of your Firebase project
2. Review the web app and cloud services used
In this section, you'll review the web app that you'll build with this codelab, as well learn about the cloud services that you'll use.
Web app
In this codelab, you'll work in the codebase of an app called Compass. It's a vacation planning app. Users can pick a destination, look through activities at the destination, and create an itinerary for their trip.
The app needs to improve engagement with the app's homepage. So in this codelab, you'll implement two ideas that rely on generative AI (or genAI):
- The app currently displays a static list of destinations. You'll change it to be dynamic!
- You'll implement an auto-populated itinerary to hopefully increase stickiness.
Services used
In this codelab, you'll use many Firebase and Cloud services and features, and most of the starter code for them is provided for you. The following table contains the services that you'll use and the reasons for using them.
Service | Reason for use |
You use Genkit to bring generative AI into a Node.js / Next.js application. | |
You store data in Cloud Firestore, which is then used for vector similarity search. | |
You use foundational models from Vertex AI (like Gemini) to power your AI features. | |
You can optionally use the new streamlined Firebase App Hosting to serve your dynamic Next.js web app (connected to a GitHub repo). |
3. Set up your development environment
Verify your Node.js version
- In your terminal, verify that you have Node.js version 20.0.0 or higher installed:
node -v
- If you don't have Node.js version 20.0.0 or higher, download the latest LTS version and install it.
Get the source code for the codelab
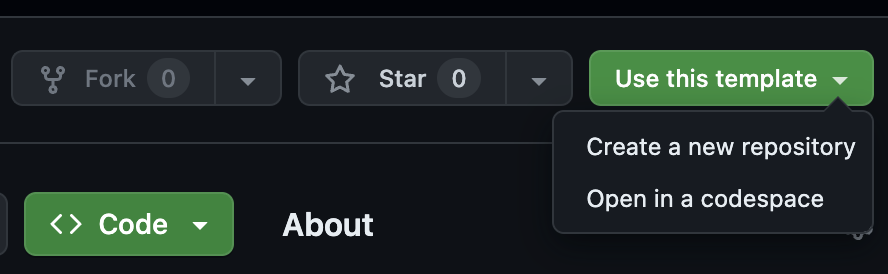
If you have a GitHub account:
- Create a new repository using our template from github.com/FirebaseExtended/codelab-ai-genkit-rag
- Clone the codelab's GitHub repository you just created:
git clone https://github.com/<your-github-handle>/codelab-ai-genkit-rag
If you don't have git installed or prefer to not create a new repo:
Download the GitHub repository as a zip file.
Review the folder structure
On your local machine, find the cloned repository and review the folder structure:
Folder | Description |
| Backend Genkit code |
| Helper command line tool to quickly pre-populate your Firestore collection |
*everything else | Next.js web app code |
The root folder includes a README.md file that offers a quick start to run the web app, using streamlined instructions. However, if you're a first-time learner, you should complete this codelab (instead of the quickstart) because the codelab contains the most comprehensive set of instructions.
If you're unsure of whether you correctly applied code as instructed throughout this codelab, you can find the solution code in the end git branch.
Install the Firebase CLI
- Verify that you have the Firebase CLI installed and that it's version 13.6 or higher:
firebase --version
- If you have the Firebase CLI installed, but it's not version 13.6 or higher, update it:
npm update -g firebase-tools
- If you don't have the Firebase CLI installed, install it:
npm install -g firebase-tools
If you're unable to update or install the Firebase CLI because of permission errors, see the npm documentation or use another installation option.
Log into Firebase
- In your terminal, log in to Firebase:
firebase login
If your terminal says that you're already logged in to Firebase, you can skip to the Set up your Firebase project section of this codelab. - In your terminal, depending on whether you want Firebase to collect data, enter
YorN. (either option works for this codelab) - In your browser, select your Google Account and click Allow.
Install Google Cloud's gcloud CLI
- Install the gcloud CLI.
- In your terminal, log into Google Cloud:
gcloud auth login
4. Set up your Firebase project
In this section, you'll set up a Firebase project and register a Firebase Web App in it. You'll also enable a few services that are used by the sample web app later in this codelab.
All of the steps in this section are performed in the Firebase console.
Create a Firebase project
- Sign into the Firebase console using a Google Account.
- Click Create a project, and then enter a project name (for example,
Compass Codelab).
Remember the auto-assigned project ID for your Firebase project (or click the Edit icon to set your preferred project ID). You'll need this ID later to identify your Firebase project in the Firebase CLI. If you forget your ID, you can always find it later in the Project Settings. - Click Continue.
- If prompted, review and accept the Firebase terms, and then click Continue.
- For this codelab, you do not need Google Analytics, so toggle off the Google Analytics option.
- Click Create project, wait for your project to provision, and then click Continue.
Add a web app to your Firebase project
- Navigate to the Project Overview screen in your Firebase project, and then click
Web.
- In the App nickname text box, enter a memorable app nickname, such as
My Compass Codelab App - Click Register app > Next > Next > Continue to console.
You can skip all the steps related to "hosting" in the Web App flow because you'll be optionally setting up a hosting service later in this codelab.
 Web.
Web.

Great! You have now registered a web app in your new Firebase project.
Upgrade your Firebase billing plan
To use Firebase Genkit and Vertex AI (and their underlying cloud services), you need to upgrade your Firebase project to enable billing.
Also note that with billing enabled on your Firebase project, you'll be charged for the calls that Genkit makes to the Gemini API. Learn more about pricing for Vertex AI.
To upgrade your project's billing plan, follow these steps:
- Navigate to Firebase Billing Plans within your Firebase project.
- In the Firebase billing plans dialog, select the Blaze plan and purchase it.
Enable Cloud Firestore
- Navigate to Firestore using the left-navigation pane.
- Click Create database > Start in test mode > Next.
- Select your preferred Cloud Firestore location (or just leave it as the default).
- Click Enable.
Enable Vertex AI
- In your terminal, link the gcloud CLI to your Firebase project:
gcloud config set project YOUR_PROJECT_ID
- Enable the Vertex AI service:
gcloud services enable aiplatform.googleapis.com
5. Set up the web app
To run the web app, you'll need to run commands in your terminal and add code within your code editor.
Set up the Firebase CLI to run against your Firebase project
In your terminal, tell the CLI to use your Firebase project by running the following command:
firebase use YOUR_PROJECT_ID
Load Firestore data
This codelab's codebase already has some sample data generated for you.
- To import the data to your Firestore instance, run this command in your terminal:
cd load-firestore-data
npm ci
node index.js YOUR_PROJECT_ID
cd ..
- In the Firebase console, navigate to Firestore within your Firebase project. You should see the imported schema.
Connect your web app to your Firebase project
Your web app's codebase needs to know which Firebase project it should use for its services, like the database. You do this by adding your Firebase configuration to your app's codebase.
- Obtain your Firebase configuration:
- In the Firebase console, navigate to Project settings within your Firebase project.
- Scroll down to the Your apps section, and select your registered web app.
- In the SDK setup and configuration pane, copy only the
const firebaseConfig = {...}fragment.
- Add your Firebase configuration to your web app's codebase:
- In your code editor, open the
genkit-functions/src/lib/genkit.config.tsfile. - Replace the relevant section with the code that you copied.
- Save the file.
- In your code editor, open the
Preview the web app in your browser
- In your terminal, install dependencies and then run the web app:
npm install
npm run dev
- In your browser, navigate to the locally hosted Hosting URL to view the web app. For example, in most cases, the URL is http://localhost:3000/ or something similar.
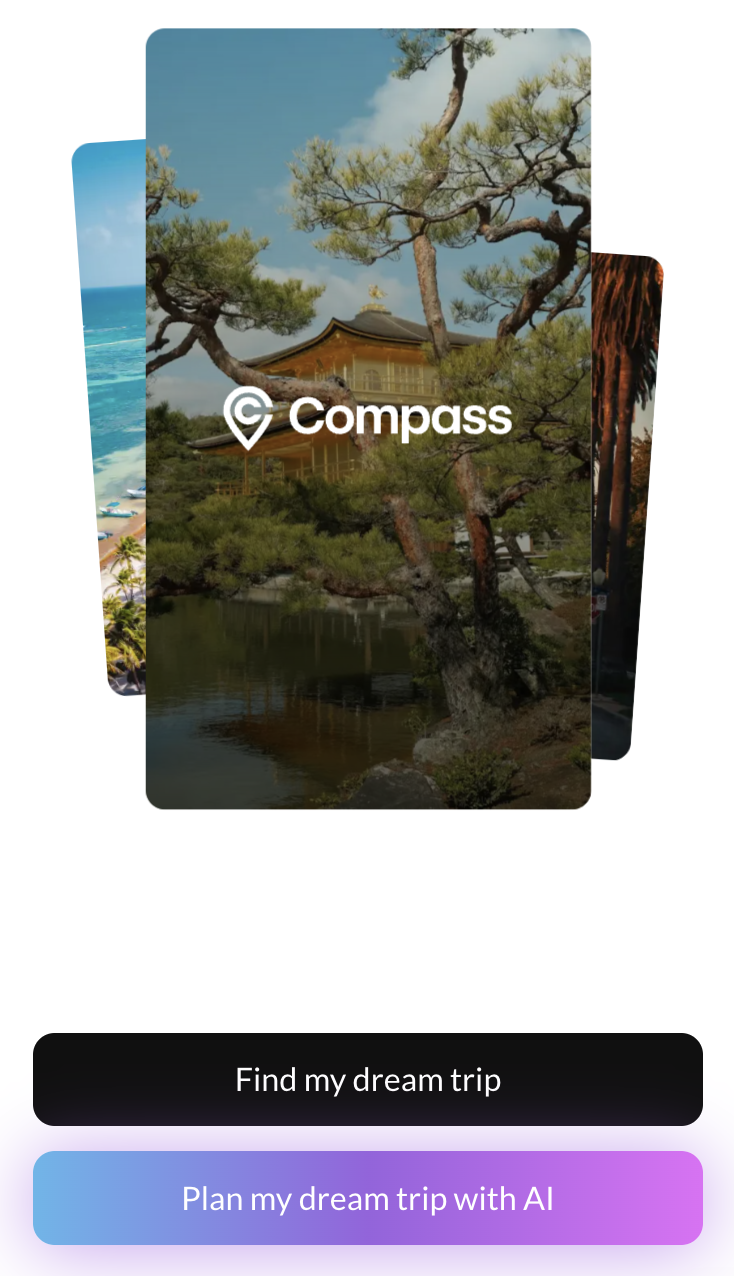
The page should load:

Compass is a Next.js app using React Server Components, and this is the homepage.
Click Find my dream trip. You can see it currently displays some hard-coded data for some fixed destinations:

Feel free to explore. When you're ready to continue, click the 
6. Start using Firebase Genkit
Now you're ready to take the big step into genAI! In this section of the codelab, you'll implement a feature that suggests a destination based on inspiration provided by your users.
To accomplish this, you'll use Firebase Genkit paired with Google Cloud's Vertex AI as the provider for the generative model (Gemini). And you'll use Firebase as the trace and flow state store (using Firestore). You can also use Firebase to deploy the Genkit code using Firebase App Hosting.
Genkit has a "developer UI" to make working with the tool visual and easier to use.
- Boot up the Genkit Developer UI by running this command in a new terminal window:
cd genkit-functions
npx genkit start
- In your browser, navigate to the locally hosted Genkit URL. In most cases, it's http://localhost:4000/.
Integrate a Gemini model
Firebase Genkit provides the Dotprompt plugin and text format to help you write and organize your generative AI prompts.
Dotprompt is designed around the premise that prompts are code. You write and maintain your prompts in specially-formatted files called dotprompt files, track changes to them using the same version control system that you use for your code, and you deploy them along with the code that calls your generative AI models.
To use Dotprompt, start with a hello-world:
- In your code editor, open the
genkit-functions/prompts/1-hello-world.promptfile.
You should see that there's an input and an output schema. - Open
dotprompt/1-hello-worldin the Firebase Genkit UI. - Use any language name or code that you're familiar with, or leave it as an empty string.
- Click Run.
- Try a few different values. Large language models are good at understanding abbreviated, misspelled, or incomplete prompts in simple queries like this one.

Define JSON schemas
But what if you don't want to just put up a wall of text in your app's UI? You might want to put some nice styling around the generated text.
With Genkit you can specify the schema that you want a prompt to output, and Genkit handles the rest. Take a look at the next prompt:
- In your code editor, open the
genkit-functions/prompts/2-simple-itinerary.promptfile.
You should see that there's an input and an output schema. - Open
dotprompt/2-simple-itineraryin the Firebase Genkit UI. - Fill in the place and interests input fields:
{ "place": "paris", "interests": [ "diner" ] } - Click Run.

Just by defining a schema, you instructed the LLM with what it needs to output. Genkit will automatically validate the output and can even be configured to retry to regenerate or heal the output if the schema isn't matched.
Multimodal input
What if you want the app to compose personalized, ideal vacation destinations based on inspiration images provided by your users? You can do this with Genkit plus a multimodal generative model!
- In your code editor, open the
genkit-functions/prompts/imgDescription.promptfile.
Notice the{{media url=this}}handlebars syntax. - Open
dotprompt/imgDescriptionin the Firebase Genkit UI. - Use a thumbnail image from Wikipedia in the imageUrls input field:
{ "imageUrls": [ "https://upload.wikimedia.org/wikipedia/commons/thumb/4/4b/La_Tour_Eiffel_vue_de_la_Tour_Saint-Jacques%2C_Paris_ao%C3%BBt_2014_%282%29.jpg/556px-La_Tour_Eiffel_vue_de_la_Tour_Saint-Jacques%2C_Paris_ao%C3%BBt_2014_%282%29.jpg" ] } - Click Run.

7. Implement retrieval
All these AI-generations are really cool, but there's a problem: you have a database of destinations (places and activities), and want the Gemini model to use only those for generating its output. So you need to somehow make sure that all the provided answers are linked to data in the database.
When you need to take an unstructured query and find relevant content, one of the most effective techniques is vector similarity search on generated embeddings.
- A vector is just an array of numbers. Each number in the vector is its value along a dimension. So a vector with two dimensions can be plotted on a graph.
- An embedding model is a type of AI model that takes input such as arbitrary text and plots it on the graph. And the location on the graph where it plots it is meaningful – inputs that are similar to each other will end up near each other.
Vector similarity search in Firestore
In Firestore, you have a list of places and each one has a text field of what that place is best known for.
You'll create a vector field named embedding for each place, using the data from the knownFor field:
- In your terminal, run the following command to install the latest alpha component. You need version
2024.05.03or later:gcloud components install alpha
- Create the index:
gcloud alpha firestore indexes composite create --project=YOUR_PROJECT_ID --collection-group=places --query-scope=COLLECTION --field-config=vector-config='{"dimension":"768","flat": "{}"}',field-path=embedding - Open the
placesRetrieverin the Firebase Genkit UI, and then Run it.
The result is a scaffolded object withTODOtext. You need to implement the retriever in the next steps. - In your code editor, open the
genkit-functions/src/lib/placesRetriever.tsfile. - Scroll all the way down and replace the placeholder
placesRetrieverwith the following:export const placesRetriever = defineFirestoreRetriever({ name: 'placesRetriever', firestore, collection: 'places', contentField: 'knownFor', vectorField: 'embedding', embedder: textEmbeddingGecko, distanceMeasure: 'COSINE', });
Now, perform a test search:
- Open the
placesRetrieverin the Firebase Genkit UI. - Provide the following Query:
{ "content": [ { "text": "new orleans" } ] } - Optionally, change some Options, like the limit.
- Click Run.

You can do additional filtering on the data beyond similarity by adding where clauses to the Options.
8. Retrieval augmented generation (RAG)
In the app, you have several prompts that take text, JSON, and/or images to generate vacation destinations and other cool things for your users.
You even have a prompt that returns relevant destinations that are in the database (Firestore).
It's time to bring them together into your first retrieval augmented generation (RAG) flow:
- In your code editor, open the
genkit-functions/prompts/itineraryGen.promptfile. - Observe how your previously simple itinerary prompt evolved to accept more inputs, including
activitiesreturned by the retriever. - In your code editor, open the
genkit-functions/src/lib/itineraryFlow.tsfile. This file contains a feature of Firebase Genkit called flows.- Flows are functions with some additional characteristics: they are strongly typed, streamable, locally and remotely callable, and fully observable. Genkit provides CLI and Developer UI tooling for working with flows (running, debugging, etc).
- To help with debugging, long flows should be split up into several steps.
- Find the
TODO: 2around line 70. This is an example of how to add a step to an existing flow. Here you'll replace the emptyimgDescriptionwith the result of theimgDescriptionprompt generate call. - Open the
itineraryFlowin the Firebase Genkit UI. - Use the following input to test successful execution of
itineraryFlowwith your newly added step:{ "imageUrls": [ "https://upload.wikimedia.org/wikipedia/commons/thumb/4/4b/La_Tour_Eiffel_vue_de_la_Tour_Saint-Jacques%2C_Paris_ao%C3%BBt_2014_%282%29.jpg/556px-La_Tour_Eiffel_vue_de_la_Tour_Saint-Jacques%2C_Paris_ao%C3%BBt_2014_%282%29.jpg" ] } - Click Run.
- If you encounter any errors or unexpected behaviors, check the Inspect tab for details. You can also use this tab to review the history of executions from the Trace Store.


RAG for your web application
Check out the Dream Your Vacation web app page (http://localhost:3000/gemini) and its source code (src/app/gemini/page.tsx) for a Next.js integration example.


9. Deploy your application
And now, one last step – deploy your web app!
For this, you can use Firebase App Hosting, the framework-aware web hosting solution that makes deploying Next.js and Angular apps to a serverless backend as simple as commit, push, and done.
- Commit your changes to GitHub and push.
- In the Firebase console, navigate to App Hosting within your Firebase project.
- Click Get started > Connect to GitHub.
- Select your GitHub account and Repository. Click Next.
- In Deployment setting > Root directory, keep the default value.
- For the Live branch, select the main branch of your GitHub repo. Click Next.
- Enter an ID for your backend (for example,
compass). - Click Finish and Deploy.
It will take a few minutes for your new deployment to be ready. You can check the deployment status in the App Hosting section of the Firebase console.
From this point forward, each time that you push a change to your GitHub repo, Firebase App Hosting will automatically build and deploy your app.
10. Conclusion
Congratulations! You achieved a lot in this codelab!
Using Firebase Genkit, Firestore, and Vertex AI, you built a "flow" for bespoke vacations which are recommended based on user's preferences and inspiration and grounded in the app's data.
You also learned several important software engineering patterns that you'll need when building genAI apps:
- Prompt management
- Multimodal content
- Input/output schemas
- Vector stores
- Data retrieval
- Retrieval augmented generation (RAG)
- "Flow" instrumentation
Note that Firebase Genkit comes with multiple deployment options that weren't described in this codelab:
- Firebase Cloud Functions
- Cloud Run
- Next.js
- Any Node.js environment
Just choose the one that is best for you by running the following inside your (package.json) node folder:
npx genkit init
Next steps
- Experiment with prompts and take advantage of the large context windows in Google AI Studio or Vertex AI Studio.
- Learn more about AI retrieval augmented generation (RAG) search.
- Check out the official docs for Firebase Genkit.
- Learn more about similarity search capabilities in Firestore and Cloud SQL for PostgreSQL.
- Go deeper into genAI flows with function calling.